Starting a Jupyter Notebook Server
A JupyterHub provides a multi-user environment to run notebooks slightly more conveniently. If you want to know more about JupyterHubs we'd recommend the official documentation.
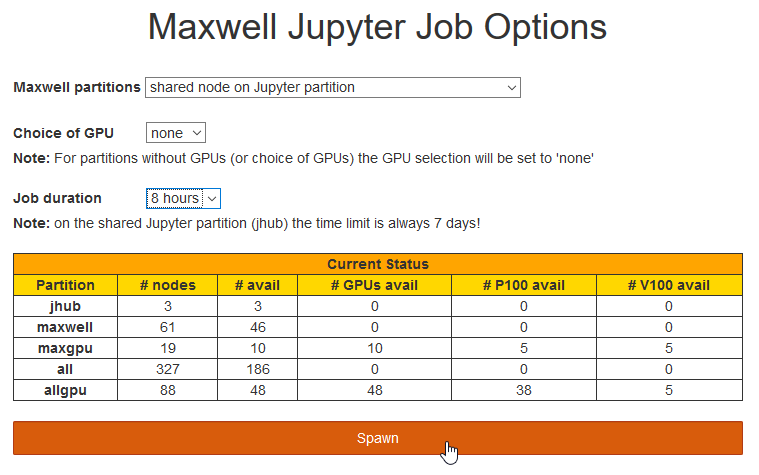
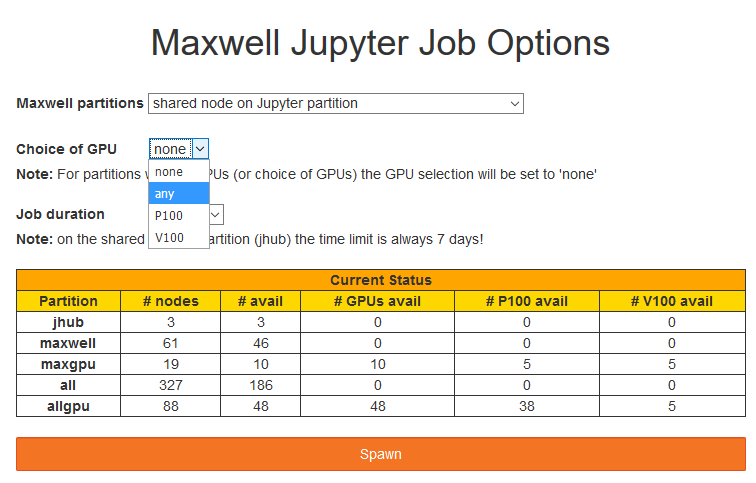
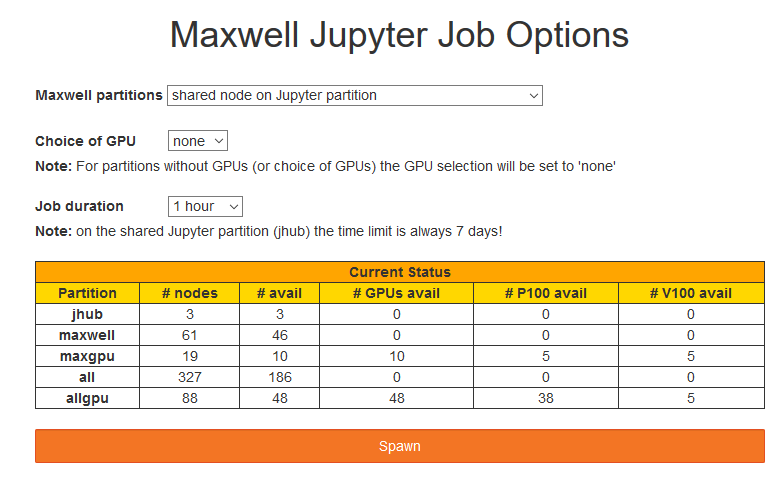
The JupyterHub on the maxwell cluster and can be reached at https://max-jhub.desy.de and is available from outside the DESY Network. For login use your DESY credentials. This only works if you also have access to the Maxwell compute cluster. If the login doesn't work, you probably are not allowed to use the cluster. You can verify that by running the command "my-resources" for example on pal.desy.de. Using the Hub is not good enough a reason to grant you the access to the Maxwell cluster. In that case you can still use your single-user server and execute any notebook of your choice. Let's assume that you successfully logged in. You will see a spawner field which allows you to choose between a few options:
The Maxwell partitions selection allows to choose a partition or reservation.
- the default is always the shared jhub partition. Each node is shared by up to 46 users!
- the lifetime of the session is 7 days on the jhub partition, 8 hours on any other partition.
- the lifetime for sessions using a reservation is set to the duration of the reservation.
- not all existing partitions are shown. It should however only show partitions & reservations you're entitled to use.
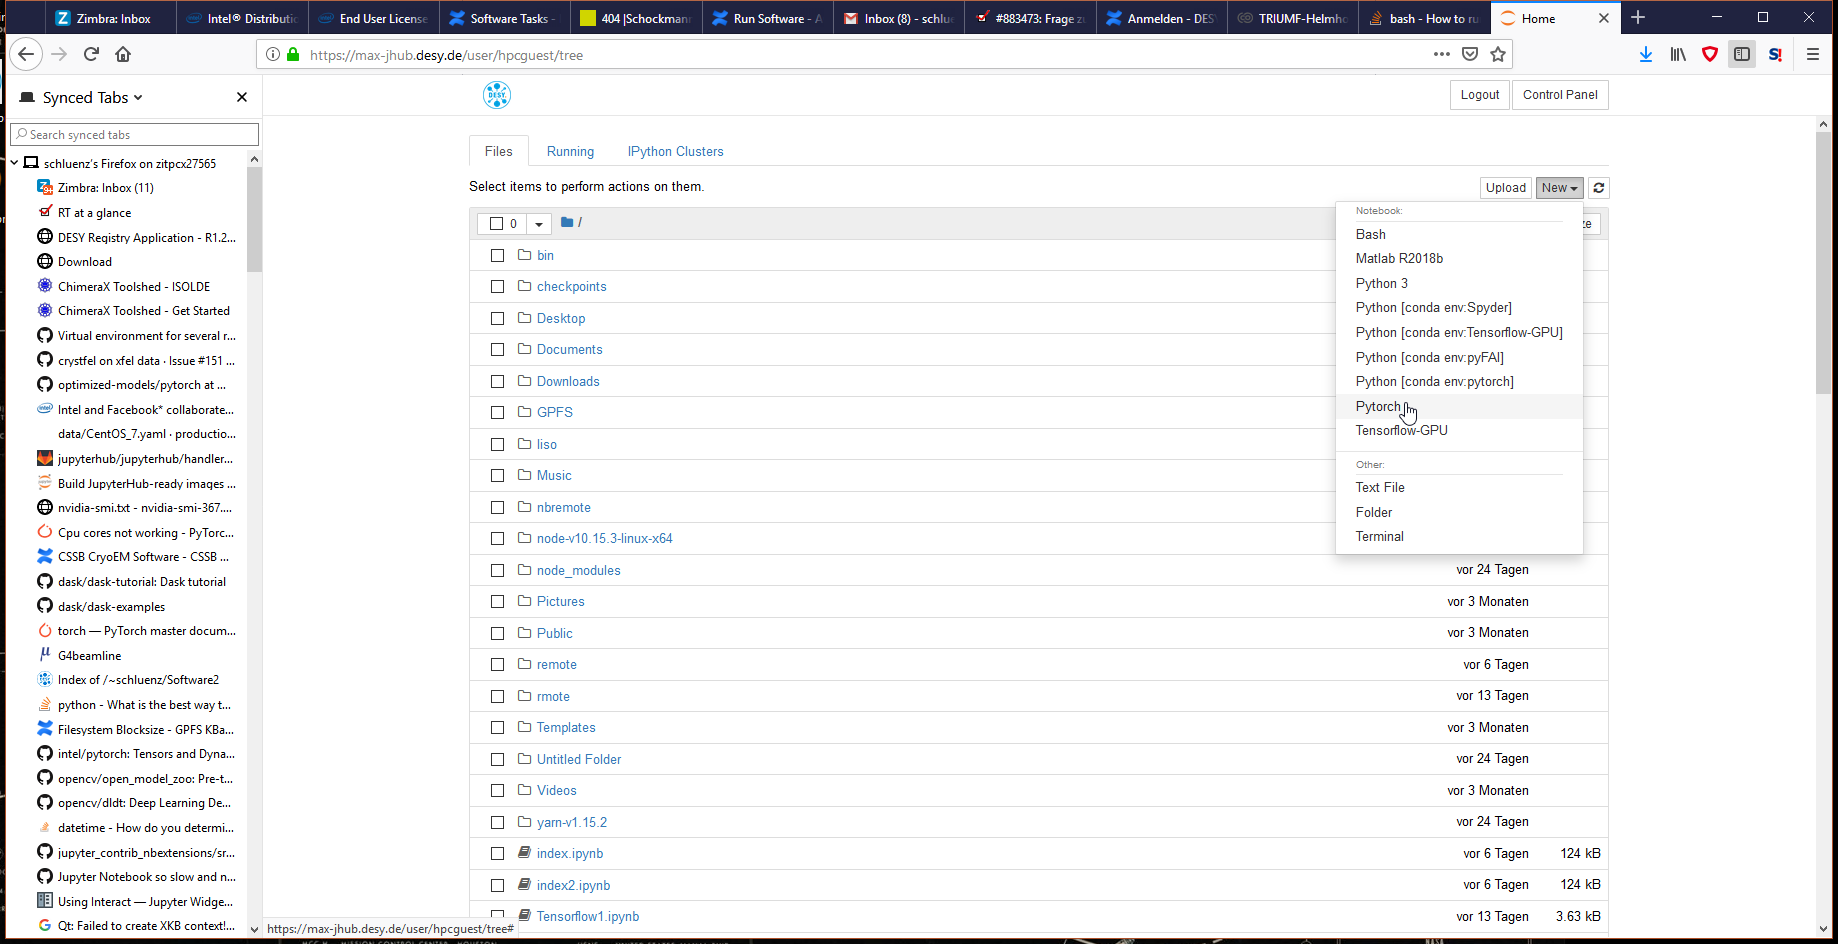
The Python Version selection allows to choose between different python environments. Currently available are
- conda Python 3.9:
module load maxwell conda/3.9 will set the same environment on Maxwell.
- conda Python 3.8:
- module load maxwell conda/3.8 will set the same environment on Maxwell
- Use the default option. Available kernels are identical for both versions.
The Launch modus selection allows to choose between different Jupyter environments:
- Launch JupyterLab: launches a Jupyter Lab instance.
- Launch Classical Notebook: the old-fashioned style, but launches much faster than lab notebooks.
The Number of Nodes selection allows to set the node allocation. Nodes is always 1 for the jhub partition.
The Constraints field allows to select nodes with specific features. Specify constraints in slurm style but without the --constraint= slurm directive, e.g. 'V100|A100' would be a valid constraint.
The Environment field allows to define environment variables, one or multiple entries per line, e.g.
- CUDA_VISIBLE_DEVICE=0 OPENCL_VENDOR_PATH=/etc/OpenCL/vendors would be a valid setup.
- Something like PATH=$HOME/blubber:$PATH should also work, but don't expect $HOME/blubber to be first in the PATH, the PATH to the python-interpreter (conda/mamba) and possibly others will always precede.
- use JUPYTERLAB_DIR=~/.jupyter/lab to mimick theJupyterLab with user extensions option
| The ? icon opens a small popup with some basic information. The popup persists until you click on the popup. The current status table at the bottom shows the currently available resources for all partitions you are entitled to use. There are several caches involved which can prevent an update of the list of partitions and reservation. Login, clear browser caches and login again if that appears to be a problem. The table with node availability is generated in 2 minutes intervals. Reload the page to update the figures, but you will loose options specified. To get really accurate information about node availability connect to max-display (ssh, fastx) and use savail savail -p allcpu,ps savail gives a detailed status of nodes. The line with state available shows what really is available including nodes which can be preempted. |

Hit the spawn button to launch your notebook server.
Stopping a Jupyter Notebook Server
Jupyter notebooks are very inefficient way of using Maxwell resources. This is in particular true for abandoned and forgotten sessions. Please terminate your notebook server when you are done!
There are various ways to stop the notebook server ...
- Cancelling the slurm job:
- login to a maxwell node (e.g. max-display.desy.de),
- check if jobs are running (e.g. squeue -u $USER -a ) and
- terminate all your jupyter sessions with scancel -u $USER -n spawner-jupyterhub.
- Classical Notebook:
- use the Hub Control Panel button
- select Stop Server and logout
- JupyterLab:
- Under Files select the Hub Control Panel,
- select Stop Server and logout
- Visit https://max-jhub.desy.de/hub/home and stop your server.
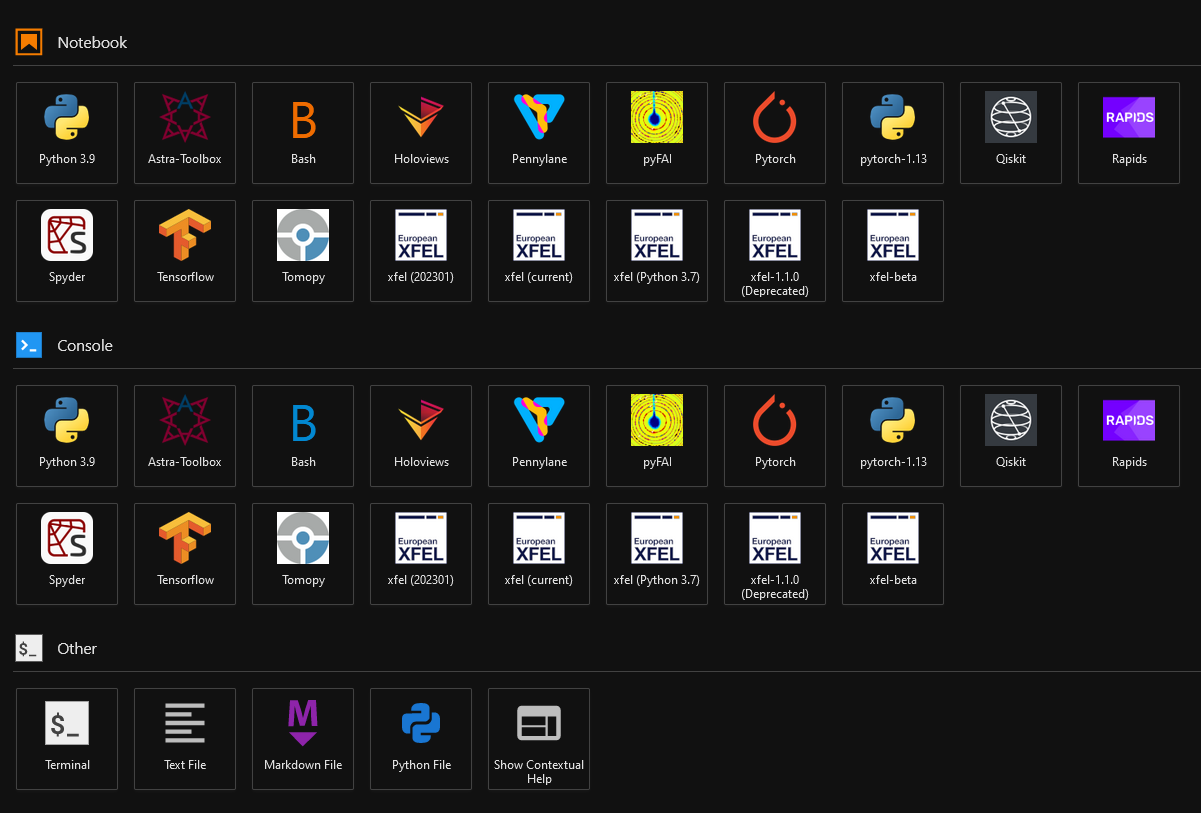
Kernels
Jupyter kernels now reside in /software/jupyter/share/kernels/. Selection of kernels are identical for conda/3.8 and conda/3.9 environments. The jupyterhub will only see the latest version for a particular application like tensorflow, but you can easily enable any kernel if needed. The selection of kernels will roughly look like shown in the image. EuXFEL kernels will only show if you are a member of groups exfel or upex. JupyterLab has no way to organize kernels into categories or things alike. You can however whitelist the kernels you really need. See Configuring Jupyter Kernels for more details. Please send a message to maxwell.service@desy.de in case
|
|