Access Methods
Native GPFS - via Maxwell
The Core filesystem is mounted on the Maxwell Analysis cluster. This is the fastest available solution for accessing the Core filesystem.
For more information about Maxwell, see Maxwell for Photon Science
SMB - For Windows, macOS and Linux users
For Windows, macOS and Linux users from Office networks, SMB is the recommended way to access the Core filesystem.
Linux desktop users should also access the Core filesystem via SMB, as it does not require any root permissions or configuration on the clients.
This is currently the only way to mount the Core filesystem on a DESY green desktop installation.
Each individual facility or research group has its own share:
| Facility | Path on GPFS | SMB Share Name |
|---|---|---|
PETRA III | /asap3/petra3/gpfs |
|
FLASH | /asap3/flash/gpfs | \\asap3.desy.de\flash-core |
| Special Instruments | /asap3/spec.instruments/gpfs | \\asap3.desy.de\spec.instruments-core |
| Research Groups | ||
| FS-FLASH-O | /asap3/fs-flash-o/gpfs | \\asap3.desy.de\fs-flash-o-core |
| FS-FLASH-B | /asap3/fs-flash-b/gpfs | \\asap3.desy.de\fs-flash-b-core |
| FS-DS-AGIPD | /asap3/fs-ds-agipd/gpfs/ | \\asap3.desy.de\fs-ds-agipd-core |
| FS-DS-Percival | /asap3/fs-ds-percival/gpfs/ | \\asap3.desy.de\fs-ds-percival-core |
| FS-PETRA | /asap3/fs-petra/gpfs | \\asap3.desy.de\fs-petra-core |
| FS-LA | /asap3/fs-la/gpfs | \\asap3.desy.de\fs-la-core |
| it-sci | /asap3/it-sci/gpfs | \\asap3.desy.de\it-sci-core |
| nanolab | /asap3/nanolab/gpfs | \\asap3.desy.de\nanolab-core |
| cfel-cmi | /asap3/cfel-cmi/gpfs | \\asap3.desy.de\cfel-cmi-core |
| FS-BMX | /asap3/fs-bmx/gpfs | \\asap3.desy.de\fs-bmx-core |
Minimum Protocol Version
The SMB service only allows connections from machines, which implement SMB2 or higher.
SMB2 is available for recent Windows versions (Windows 7 and newer) and modern Linux distributions.
Some Linux tools might need additional configuration options to use SMB2, e.g. smbclient can be forced to use SMB2/3 by setting -m SMB3
Windows 7 EOL
Windows 7 has reached end of life on 2020-01-14 and no longer receives any security updates.
Access via SMB from Windows 7 hosts is therefore no longer supported.
See below for a manual on how to access the SMB share by mapping a network drive:
- Start the File Explorer
- Right click on Network and select Map network drive...
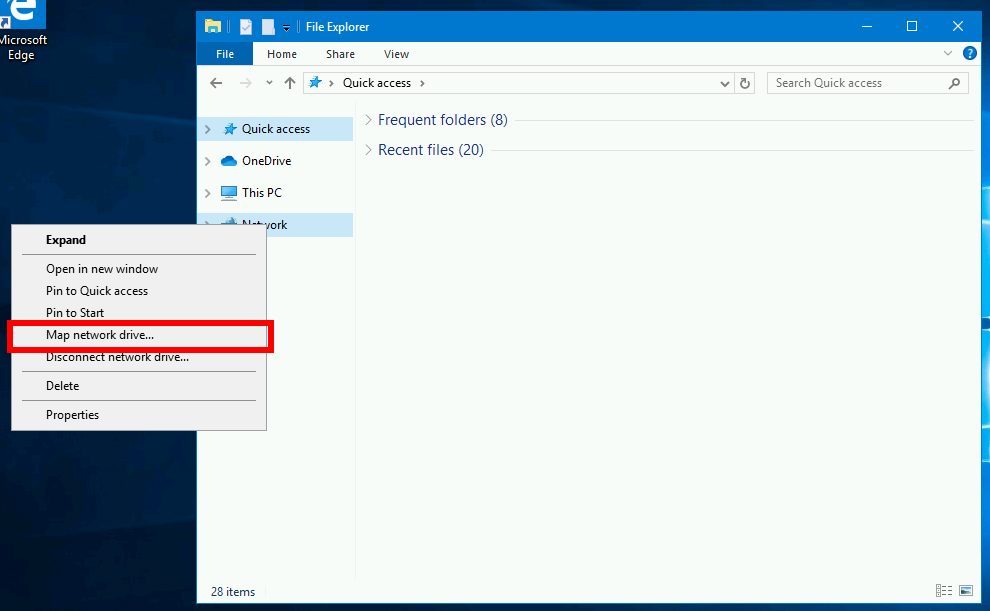
- Select the drive letter to which the share will be mapped and enter the share name you want to access

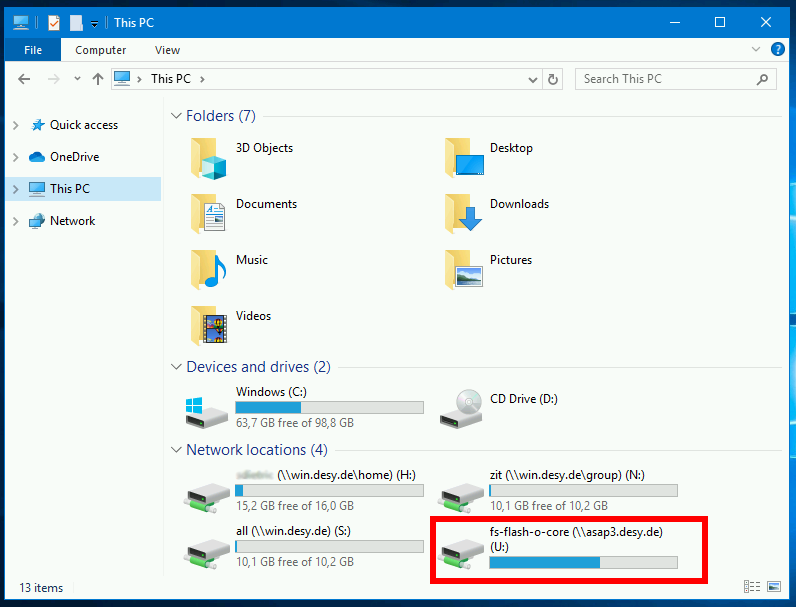
For Windows machines administered by FS-EC, the drive letter U: is recommended. - The share will be mapped and displayed in This PC, double click on the share to access the data.
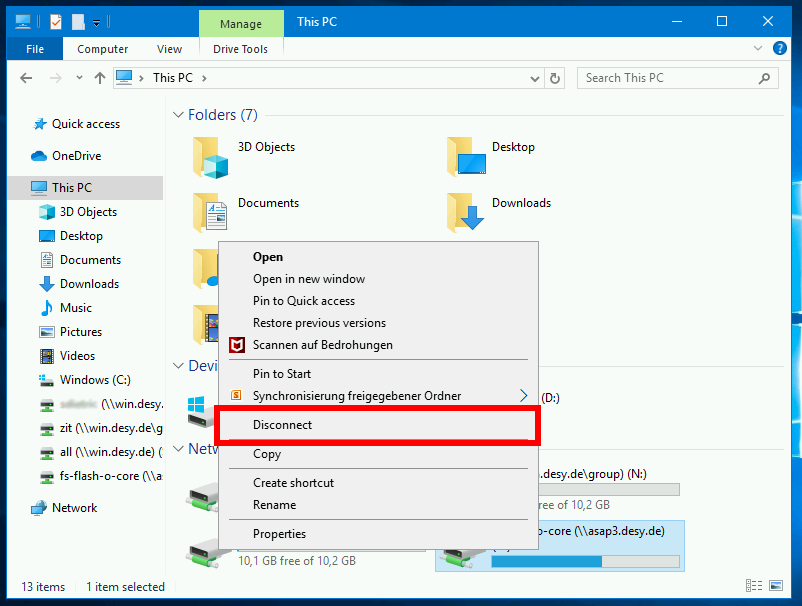
- If you want to unmap the share, right click on the share and select Disconnect
1. Start Finder and click on Go and select Connect to Server in the menu bar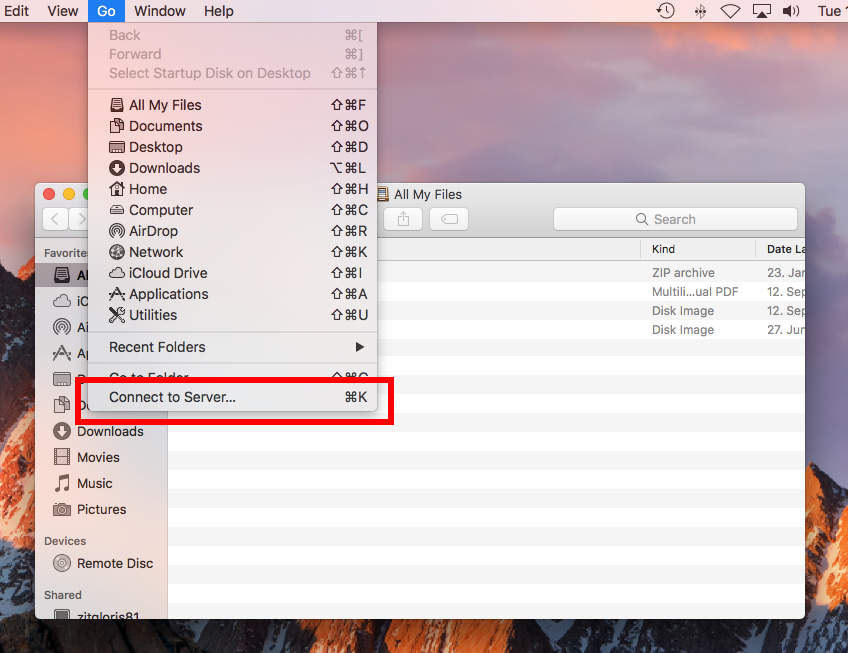
2. In the next window, specify the SMB share name you want to access. You might need to replace backslashes with a forward slash.
3. Confirm that you want to connect to this SMB server
4. You will be prompted to authenticate, choose Connect As: Registered User and enter your DESY account and password and click connect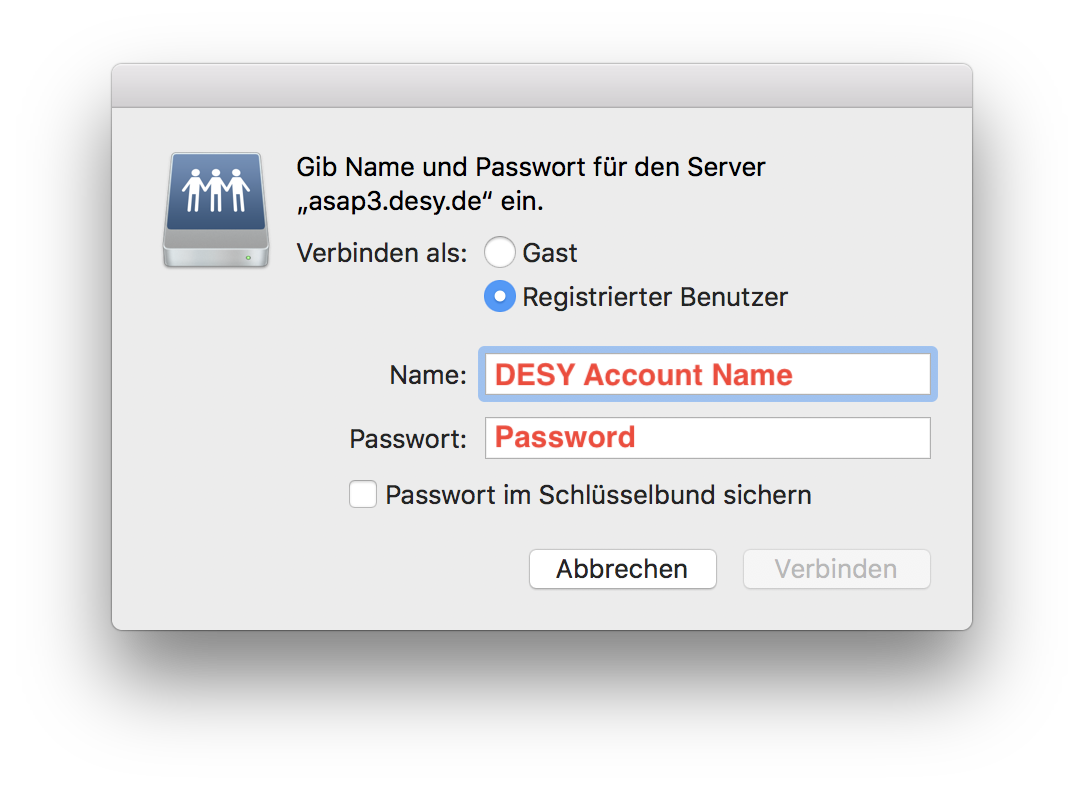
5. A new tab will open in the finder and you can now access the data from the Core filesystem. To unmount the filesystem, click on the eject button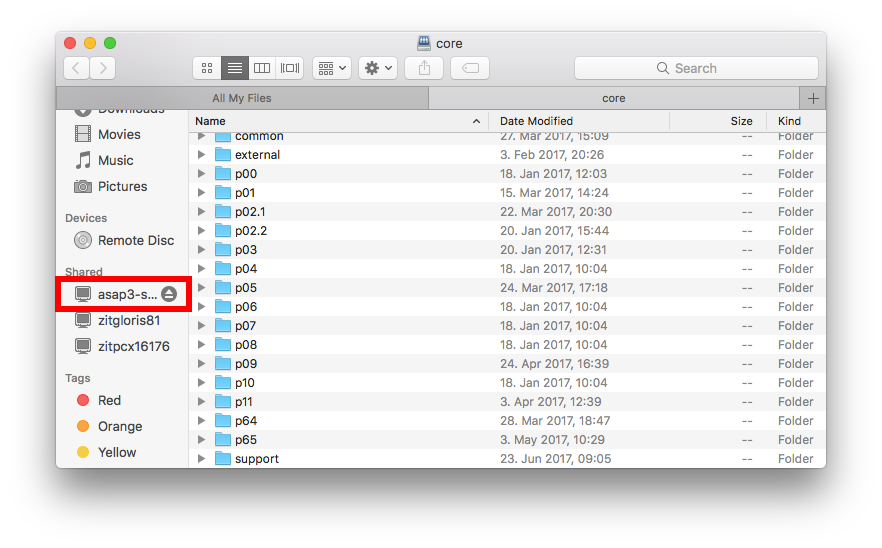
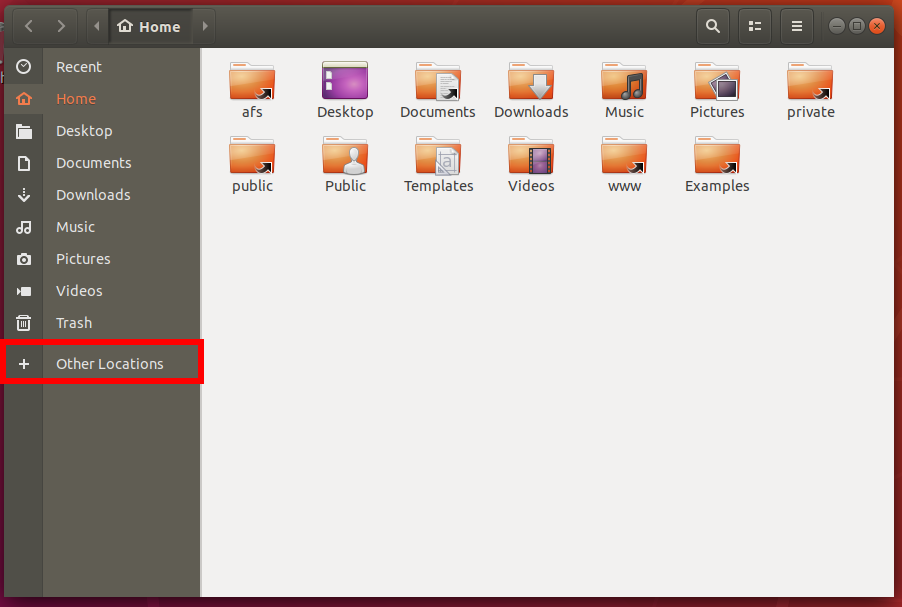
- Open the Files or Nautilus application and click on + Other Locations
- Enter the SMB share prefixed with smb://, backslashes have to be converted to forward slashes
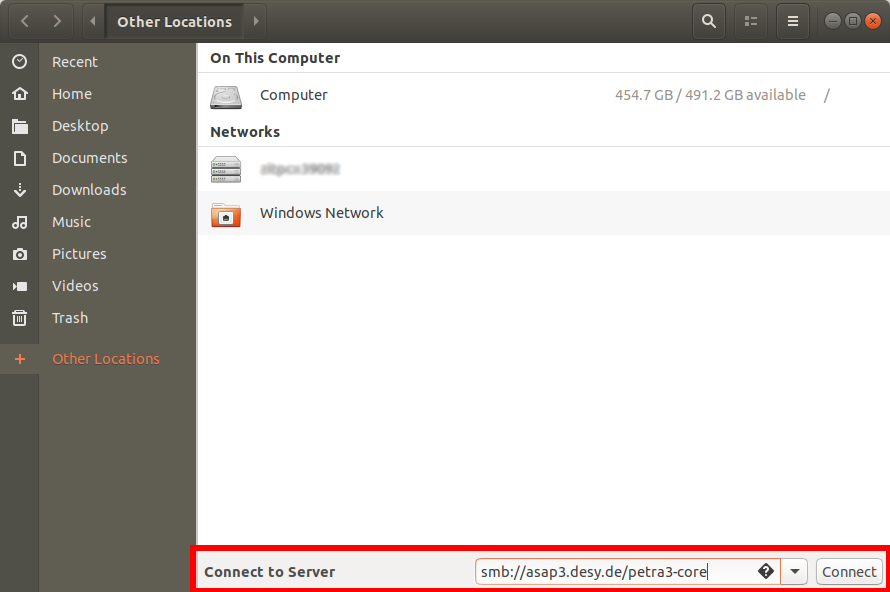
- Enter your DESY Account name and password
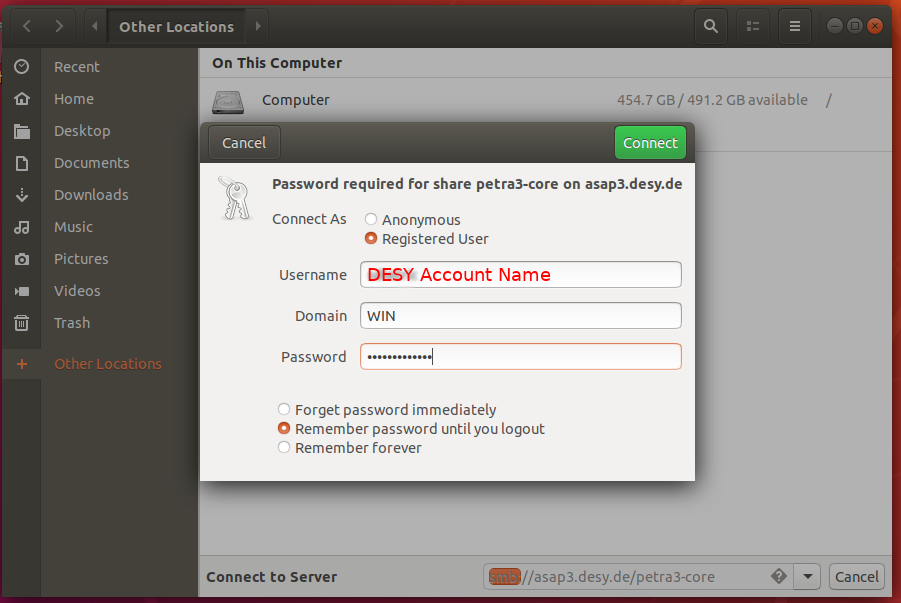
- The share has now been mapped and data can be accessed. To unmap the share, click on the eject button
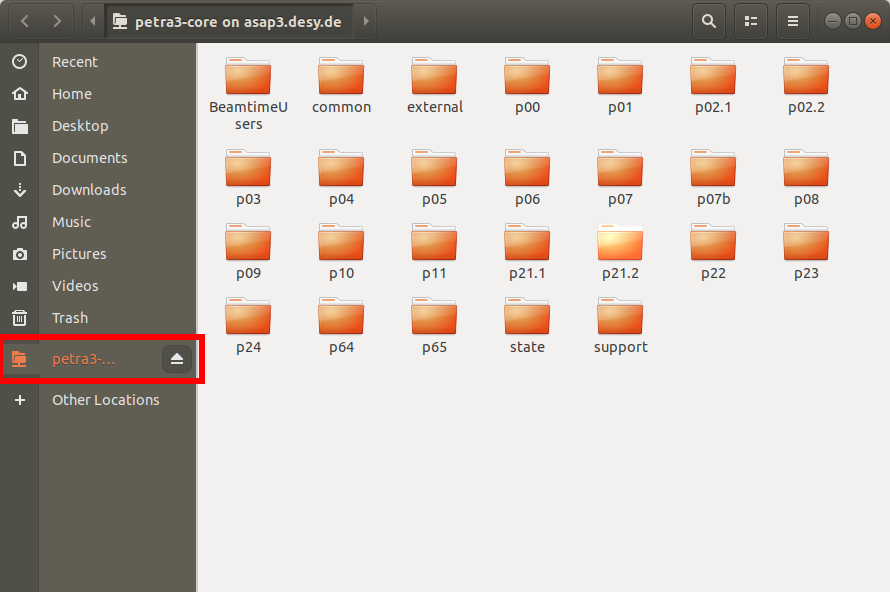
- If you need to access the share from the CLI, look into /run/user/<your numeric userid>/gvfs/<share name>
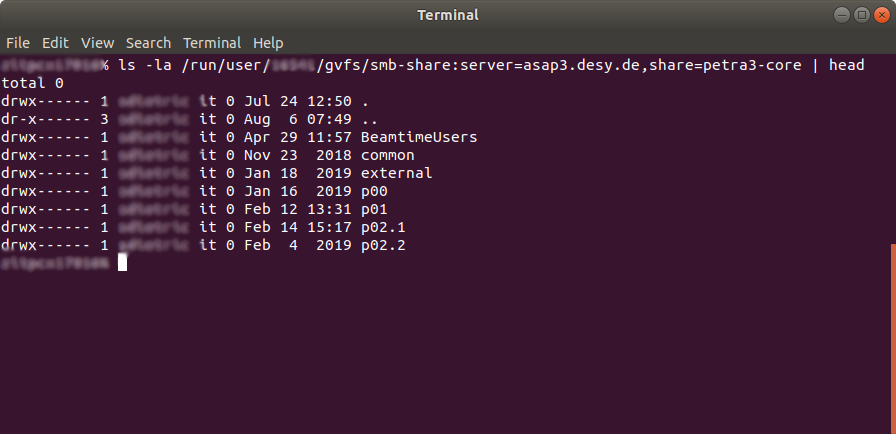
To display your numeric userid, use the id command.
NFSv4 - For Linux users
While SMB is still the recommended way to access the Core filesystem, certain use-cases require an NFS mount.
For this purpose, an NFSv4 export with and without Kerberos is available.
| Facility | Path on GPFS | NFS Export |
|---|---|---|
PETRA III | /asap3/petra3/gpfs |
|
FLASH | /asap3/flash/gpfs | asap3.desy.de:/asap3/flash/gpfs |
| Special Instruments | /asap3/spec.instruments/gpfs | asap3.desy.de:/asap3/spec.instruments/gpfs |
| Research Group | ||
| FS-FLASH-O | /asap3/fs-flash-o/gpfs | asap3.desy.de:/asap3/fs-flash-o/gpfs |
| FS-FLASH-B | /asap3/fs-flash-b/gpfs | asap3.desy.de:/asap3/fs-flash-b/gpfs |
| FS-DS-AGIPD | /asap3/fs-ds-agipd/gpfs | asap3.desy.de:/asap3/s-ds-agipd/gpfs |
| FS-DS-Percival | /asap3/fs-ds-percival/gpfs | asap3.desy.de:/fs-ds-percival/gpfs |
| FS-PETRA | /asap3/fs-petra/gpfs | asap3.desy.de:/asap3/fs-petra/gpfs |
| CFEL-CMI (KRB5 only) | /asap3/cfel-cmi/gpfs | asap3.desy.de:/asap3/cfel-cmi/gpfs |
| FS-BMX (KRB5 only) | /asap3/fs-bmx/gpfs | asap3.desy.de:/asap3/fs-bmx/gpfs |
Restricted Mount Access
Access to the NFSv4 exports are either restricted by IP subnet or netgroups from LDAP.
For PETRA III, the following subnets are allowed to mount the Core filesystem with kerberos:
For Special Instruments, the following subnets are allowed to mount the Core filesystem with kerberos:
For FLASH, hosts in the LDAP netgroup a3-flash-core-krb5-hosts are allowed to mount the core filesystem.
To display the hosts, you can use ldapsearch on pal.desy.de: ldapsearch -x cn=a3-flash-core-krb5-hosts
For FS-FLASH-O, hosts in the LDAP netgroup a3-fs-flash-o-core-krb5-hosts are allowed to mount the core filesystem.
To display the hosts, you can use ldapsearch on pal.desy.de: ldapsearch -x cn=a3-fs-flash-o-core-krb5-hosts
For FS-FLASH-B, hosts in the LDAP netgroup a3-fs-flash-b-core-krb5-hosts are allowed to mount the core filesystem.
To display the hosts, you can use ldapsearch on pal.desy.de: ldapsearch -x cn=a3-fs-flash-b-core-krb5-hosts
For FS-BMX, hosts in the LDAP netgroup a3-fs-bmx-core-krb5-hosts are allowed to mount the core filesystem.
To display the hosts, you can use ldapsearch on pal.desy.de: ldapsearch -x cn=a3-fs-bmx-core-krb5-hosts
Mounting via NFSv4 with Kerberos
Mounting the Core filesystem via Kerberos requires root privileges on the client machine.
mount with krb5
mount -o nfsvers=4,sec=krb5,hard <NFS Export> <local mountpoint>
Example
mount -o nfsvers=4,sec=krb5,hard asap3.desy.de:/asap3/flash/gpfs /asap3/flash/gpfs
Additional configuration and a kerberos keytab is required on the client machine, the setup for this is out of scope for this documentation.
Due to the nature of Kerberos, access is only possible while you have a valid kerberos ticket. The ticket lifetime is usually limited to 24h. Afterwards, the ticket has to be renewed in order to access the data.
This is usually ok, but cumbersome for long running, non-interactive processes.
Mounting via NFSv4 without Kerberos
Mounting the Core filesystem without Kerberos requires root privileges. Due to the security implications for this type of mount, this must be explicitly requested, as the host will be included in a whitelist.
Please contact FS-EC (fs-ec@desy.de) in order to be included in the whitelist.
mount without krb5
mount -o nfsvers=4,sec=sys,hard <NFS Export> <local mountpoint>
Example
mount -o nfsvers=4,sec=sys,hard asap3.desy.de:/asap3/flash/gpfs /asap3/flash/gpfs
Additional configuration is required on the client machine, the setup for this is out of scope for this documentation.